Installing roller shutters is one of the smartest upgrades you can make to a home or commercial property. From improving security and insulation to reducing noise and boosting street appeal, roller shutters deliver long-term value when installed correctly. However, a poor installation can undo many of these benefits.
Drawing on hands-on industry experience, this guide walks you through practical roller shutter installation tips to ensure a smooth, stress-free process—whether you’re preparing for professional installation or simply want to understand what’s involved.
Why Proper Roller Shutter Installation Matters
Roller shutters are precision systems. Even the highest-quality shutters won’t perform well if they’re poorly measured, misaligned, or incorrectly wired.
A smooth installation ensures:
- Reliable operation for years
- Maximum security and weather protection
- Proper insulation and energy efficiency
- Compliance with Australian building standards
- Reduced maintenance and repair costs
In short, installation quality directly affects performance, safety, and lifespan.
Pre-Installation Planning: Set the Foundation Right
Assess Your Property Needs
Before installation begins, take time to clarify your goals. Different needs call for different shutter designs.
Ask yourself:
- Is security the main priority?
- Do you want heat and light control?
- Are noise reduction or privacy concerns important?
- Manual or motorised operation?
Clear answers help avoid costly changes later.
Choose the Right Type of Roller Shutter
Not all roller shutters are the same. Selecting the correct option upfront ensures a smoother install.
| Shutter Type | Best For | Key Benefit |
| Aluminium roller shutters | Homes & shops | Durable and lightweight |
| Insulated shutters | Hot climates | Improved thermal performance |
| Manual shutters | Small windows | Cost-effective |
| Motorised shutters | Large openings | Convenience and safety |
Accurate Measurements: The Make-or-Break Step
Incorrect measurements are one of the most common causes of installation delays and performance issues.
Measurement Checklist
- Measure width and height at three points
- Confirm wall material (brick, concrete, timber)
- Identify obstructions (pipes, wiring, downpipes)
- Allow clearance for the shutter box and guides
Pro tip: Always measure twice. Precision here saves hours during installation.
Preparing the Installation Area
A well-prepared site speeds up the process and prevents damage.
What to Do Before Install Day
- Clear furniture and outdoor items
- Ensure safe ladder access
- Confirm power access for motorised units
- Protect floors and window frames
- Inform occupants about noise and drilling
These small steps make a big difference to efficiency.
Step-by-Step Roller Shutter Installation Overview
While professional installers handle technical details, understanding the process builds confidence.
Step 1: Mounting the Shutter Box
- Securely fix above or within the window opening
- Ensure perfect alignment to prevent jamming
- Seal edges for weather protection
Step 2: Installing Guide Rails
- Guides must be level and plumb
- Anchored firmly to the wall
- Checked for smooth shutter movement
Step 3: Fitting the Curtain
- Curtain is fed into the guides
- Tested for even rolling and tension
- Adjustments made before final fixing
Step 4: Electrical Connection (Motorised Units)
- Wired by a licensed electrician
- Switches or remotes tested
- Safety cut-offs checked
Step 5: Final Testing and Calibration
- Open and close multiple times
- Listen for unusual noise
- Confirm locking and stopping points
Common Installation Mistakes to Avoid
Even experienced trades can run into issues if shortcuts are taken.
Watch out for:
- Poor alignment causing friction
- Incorrect fixing for wall type
- Inadequate sealing against weather
- Skipping electrical compliance checks
- Rushing the calibration stage
Avoiding these mistakes protects your investment.
Pros and Cons of Professional Installation vs DIY
Professional Installation
Pros
- Expertise and efficiency
- Warranty protection
- Compliance with Australian standards
- Safer electrical handling
Cons
- Higher upfront cost
DIY Installation
Pros
- Lower immediate expense
- Flexible timing
Cons
- Risk of errors
- No workmanship warranty
- Electrical safety concerns
- Potential voiding of product warranty
For most properties, professional installation delivers better long-term value.
Special Considerations for WA Conditions
Western Australia’s climate presents unique challenges—strong sun, coastal air, and temperature extremes.
If you’re installing roller shutters in Perth or surrounding areas, ensure:
- Corrosion-resistant materials
- UV-stable coatings
- Proper ventilation for heat expansion
- Installer familiarity with local conditions
This is where experienced providers of roller shutters perth wa truly stand out.
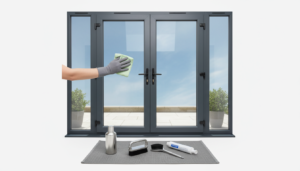
Post-Installation Care Tips
A smooth installation doesn’t end on install day.
Maintenance Checklist
- Clean guides every 3–6 months
- Avoid forcing shutters if stuck
- Test motors annually
- Check seals after storms
- Schedule professional servicing as needed
Regular care extends lifespan and keeps operation smooth.
Frequently Asked Questions (FAQ)
How long does roller shutter installation take?
Most standard installations take 1–3 hours per window, depending on size and motorisation.
Do roller shutters require council approval?
In most cases, no. However, strata or heritage-listed properties may require permission.
Can roller shutters be installed on existing homes?
Yes. Roller shutters are commonly retrofitted with minimal structural changes.
Are motorised roller shutters safe?
Absolutely—when installed correctly with modern safety stops and professional wiring.
How long do roller shutters last?
With proper installation and maintenance, quality roller shutters can last 15–20 years or more.
Final Thoughts: Get the Installation Right the First Time
Roller shutters are a long-term investment in comfort, security, and energy efficiency. A smooth installation process starts with planning, continues with expert execution, and finishes with proper testing and care.